Like any good software, WordPress, the world’s most popular CMS platform, is always in ‘work in progress’ mode. This means that WordPress developers keep enhancing its functionality and fixing/removing any security vulnerabilities in earlier versions. As WordPress users, you need to keep updating your website to make the most of these functionalities and bug fixes.
But a WordPress update can sometimes cause your site to break or crash. Through this step-by-step guide, we show you how to update WordPress sites safely. Before diving into the details, let us understand what a WordPress update is in the first place.
What are WordPress Updates?
WordPress, like most other software, has its cycle of major or minor versions. While a major WordPress version (for example, 9.0) may contain new features and enhancements, minor versions (like 9.0.2) usually contain fixes or patches for reported bugs.
A WordPress update is primarily installing the latest available version of the Core WordPress and third-party plugins and themes. Essentially, a WordPress update installs the new version of these components after they are released in the marketplace.
WordPress updates can be performed either automatically or manually. We’ll discuss both later in this article. Next, let us see the things you need to do before you upgrade or update WordPress sites.
Things to Do Before Upgrading WordPress
As a website owner, you want to ensure that your WordPress upgrade process is smooth and does not impact your site’s functioning or inconvenience your current users. Here are a few things you must perform before your WordPress upgrading:
- Take a complete backup of your WordPress site and database files. The time taken for backups will depend on the size of your WordPress installation. Also, take a backup of your third-party plugin/theme files.
- Next, disable or deactivate the caching mechanism (if enabled) on your website. This ensures that caching does not meddle with the update process. Remember to enable caching once you have completed the update process.
- Plugin/theme updates often follow major WordPress versions. For each of your installed plugins/themes, ensure that the latest versions are compatible with the WordPress version that you are planning to upgrade to. Remove (or replace) any plugins/themes that do not have upgraded versions that are compatible with the main WordPress version.
- Check all your website functionalities like posts, comments, and user input fields – and fix any bug or issue before updating.
Once you have completed these steps, you can go ahead with your WordPress update.
How to Update WordPress Successfully
Before we get into how to update WordPress sites successfully, it is important to remember that WordPress updates are not a “one-off” but a regular part of WordPress maintenance. There are many ways to update WordPress, including:
- Automatically
- From the WordPress dashboard
- Manually using an FTP tool
- Using a plugin like BlogVault
How to update automatically
Automatic updates are the most convenient of all methods, as it requires no human intervention. Available from WordPress version 3.7 onwards, you can use automatic updates for both major and minor versions. By default, automatic updates are enabled for any installation.
To enable (or disable) automatic updates, add the ‘WP_AUTO_UPDATE_CORE’ in the wp-config.php file as follows:
define(‘AUTOMATIC_UPDATER_DISABLED’, <value>);
where the <value> can be set to:
- true – to enable both major and minor updates.
- false – to disable all automatic updates.
- minor – to enable automatic updates to only minor WordPress versions.
How to update from the dashboard
You can apply your WordPress updates from the dashboard of your WordPress account. This is probably the easiest way to update WordPress.

From the dashboard account page, navigate to the Updates page, where you can check if an updated version of WordPress is available. If yes, then the WordPress version number will be mentioned. All you need to do is click the “Update now” button – and WordPress will install the mentioned version on your website.

At times, you may also need to perform a WordPress update on your database to make it compatible with the upgraded version. You can easily perform this task from the Updates page of your dashboard.
How to update manually using FTP
Apart from using the WordPress dashboard or plugins, you can upgrade WordPress manually by using an FTP tool like FileZilla. This method requires you to have technical knowledge about WordPress installation and FTP tools.
Here are the steps you need to perform:
- Download the updated WordPress version from the WordPress download page.
- Extract the downloaded zip file into a WordPress folder. This will contain all the website files that you will need.
- Next, open the FileZilla FTP tool and use your FTP credentials to connect to your website.
- Navigate to your website root folder (example, public_html) and view all your current WordPress installation files and folder.
- From the “Local Site” panel, select all the contents of the downloaded WordPress folder.
- Upload the selected files from your system to the website.
This will overwrite all your existing WordPress website files with the freshly downloaded version. As you can see, manually updating WordPress can be a complex and technical process as compared to the other methods.
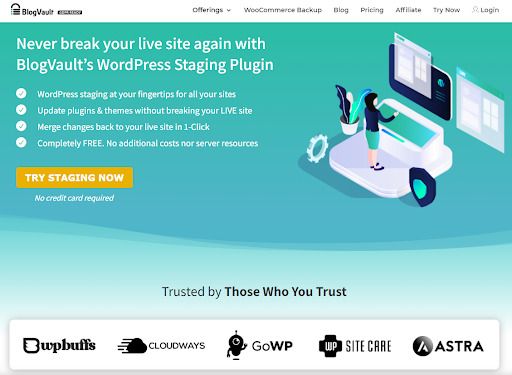
How to update WordPress safely using a plugin
This method of updating the WordPress site uses the BlogVault backup plugin. We have included it here because both WordPress backups and updates can be performed using the same tool instead of investing in separate tools.
There’s another advantage too. Updates can sometimes break your site due to compatibility issues. The best way to avoid this is to use a staging environment. A staging site creates a replica of your site such that any changes on it do not impact the live site. BlogVault offers an inbuilt website staging feature.
All you need to do is sign in to its dashboard and click “Add Staging site” from the Staging section. After you apply the WordPress updates on the staging website and test if it works fine, you can merge the updates with the live website using the BlogVault dashboard.
How to Update WordPress Plugins/Themes
Once you have updated your Core WordPress version, the next step is to update all your installed plugins/themes to make them compatible with the upgraded WordPress. The easiest way to update plugins/themes is from your WordPress hosting account. From the Updates page, you can view available updates for each of your plugins/themes. All you need to do is click the “Update plugin” (or theme) button to apply the latest updates. Alternatively, you can perform bulk updates of all your installed plugins/themes from the Plugins page.
Troubleshooting WordPress Update Errors
During the WordPress update process, you may experience a few update errors. Here are five of the common errors and how to fix them:
-
Internal Server Error

Check for a corrupted .htaccess file that might be causing this issue. You can generate a new, bug-free .htaccess file by going into your admin dashboard and accessing Settings > Permalinks. Click on Save Changes to generate a new .htaccess file. Alternatively, you can try increasing the PHP memory limit or deactivating your plugins. Here’s a post with some additional information about internal server errors.
-
Syntax error

This error occurs when your code has an incorrect syntax (indicated by the line number). To resolve this problem, you need to fix the syntax code.
-
Error establishing a database connection

This error could occur if your default database credentials have been modified and your site’s wp-config.php file is unable to access the database. To fix this, you need to enter the correct credentials. To do that, access your phpMyAdmin to find the exact details of the hostname, username, password, and/or database name.
-
White screen of death
Check if the same problem has occurred on other hosted websites. If not, this error can be caused by an updated plugin. Try to deactivate all your plugins or increase your memory limit. You can raise your limit by editing the php.ini file.
-
404 Error
This error occurs when your .htaccess file has been deleted. To fix this problem, update your permalink settings from your WordPress hosting account to generate a new .htaccess file, as mentioned earlier.
Conclusion
Before we wrap up, here’s a quick summary of why WordPress updates are so important.
- New features that can enhance the functionality of your website
- Improved security for your website against online threats and bad actors
- Better website performance as WordPress developers work to make WordPress versions faster
- Bug fixes that are available in both major and minor WordPress versions
One of the risks or disadvantages associated with WordPress updates is that they can break a website or cause incompatibility issues. The best way to avoid this is always to make a backup before an update. Even better, always test your site on a staging site first. An excellent way to combine both these approaches is to use a backup plugin like BlogVault that offers both.
We hope this guide helps you plan a better WordPress management strategy for your site. If you need any help managing your WordPress site, contact us today – we love to help!