
Starting a WordPress blog is an excellent way to build brand awareness and establish your authority in a particular niche. No other inbound content strategy works quite as well as blogging when establishing a connection with a target audience, provided they can find you.
WordPress has long been the go-to platform for business blogging because of its customizable, responsive themes and its wide array of excellent SEO plugins that help ensure the blogs built on the platform rank well on search engines. It’s also user-friendly—you can create a stunning WordPress blog for any industry or niche even without coding experience.
These are some of the reasons why 43% of all websites today use WordPress as the content management system (CMS) for their blogs. Soon, you will be one of those happy users. These steps for starting a WordPress blog will set you up on your blogging journey.
Step 1: Choose Your CMS Platform
Most people don’t realize that there are two versions of WordPress: open-source, self-hosted (WordPress.org), and hosted (WordPress.com). We discussed the difference in this article, which will explain why we recommend using WordPress.org if you intend to use your blog for content marketing.
If you want to own your blog and have complete control over your content, you will want to use WordPress.org.
Step 2: Choose Your Domain Name
Assuming you decide that WordPress.org is the platform for your blog, the next step is choosing a domain name. A domain name is the blog’s website address and typically takes the form of yoursite.com, yoursite.org, and so on.
Your domain name can be anything, but you want to keep it simple and close to the purpose of the blog site. For example, if the blog is meant to promote your restaurant called Hot Mama, you might want to choose hotmamaeats.com as a domain name for the blog.
You can also use keywords to name your blog. For example, if your blog focuses on spicy food, you can choose spicyfoodrecipes.com as the domain name.
It would be best to prepare variations of your preferred domain name in case your first choice is already taken. You can check the availability of your preferred domain name on domain and hosting providers such as Godaddy.com.
Step 3: Choose Your Hosting Service
WordPress.org requires the hosting service to support the following:
- PHP version 7.4 or higher
- MySQL version 5.7 or higher OR
MariaDB version 10.2 or higher
- HTTPS
WordPress also recommends Apache or Nginx servers if possible, but any that support the above languages should be fine.
Aside from the language specifications, you also need to consider speed. Loading speed is a primary factor for a positive SEO ranking and user experience. You’ll want to choose a hosting platform known to load content-heavy blog pages as fast as possible. Shared hosting services are affordable, but your page loading will likely suffer.
There are ways to optimize a site so pages will load faster. However, you will probably encounter limitations in the base capacity of the hosting platform (such as using a Content Delivery System) and your ability to tweak the code.
You might want to consider managed WordPress hosting services for a turnkey solution for creating your blog. The downside is that managed hosting is often more expensive than a shared hosting service. That said, the cost might be worth it if your blog site is critical to your content marketing success.
Step 4: Download WordPress
If you opt for a managed hosting service, you can skip this step as it will install WordPress for you and provide you access to your WP dashboard. If you need access to SFTP and MySQL, they will also provide that.
You can also ignore the next step if you want. A managed hosting service provider usually charges a one-time fee to design and set up your site.
Alternatively, you can choose from several hosting services with compatible tools to install WordPress automatically with the click of a button. Most hosting platforms will provide you with credentials and installation instructions to upload your WordPress blog to their servers.
You can also choose to install the site manually, in which case you will need to download WordPress and follow the detailed installation instructions. Suppose you feel the installation is beyond your ability to carry out correctly, you can then choose to hire a web developer to do the installation and design for you. Developer fees typically start at $500 for a simple site.
Be sure to get complete documentation from the developer if you need to change something or fix a problem in the future.
Step 5: Choose and Customize a Theme

Source: WordPress.org
Once you’ve created a WordPress site, a theme becomes active. This might be the default WordPress theme or one you chose when you set up your blog using the host platform’s installation wizard. You can stick with these themes or replace them with one of the more than 9,000 free themes on WordPress.org.
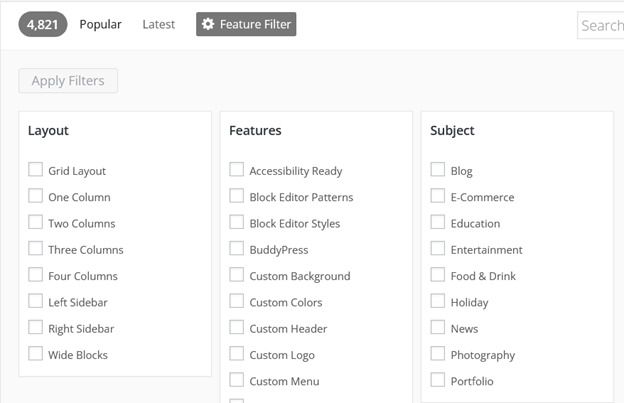
You can filter the themes by popularity, latest, or feature. When you filter through “feature,” you can tick the boxes according to layout, features, and subject.
Source: WordPress.org
Since WordPress is open-source, you can modify the themes in any way you like. You can also opt to get free and paid themes developed by third-party sites such as ThemeForest and ThemeIsle. If you select a theme outside of WordPress, you typically download the zip file to your computer.
Once you select a theme, head to your WordPress dashboard, hover over Appearance, select Themes, and click on Add New.
If you want one from WordPress, search for the theme and click Install.
For themes outside of WordPress, click on Upload Theme and select the zip file you downloaded or received from the developer. Click Install.
After installing a theme, click on Activate, so it becomes the active theme of your WordPress blog. You can then click on Appearance > Customize to access the options for changing theme elements.
Step 6: Add Plugins

Source: WordPress.org
WordPress sites typically require plugins, most of which are free, to enhance functionality. You can choose from more than 59,000 plugins on WordPress or from a third-party developer.
We recommend the following free plugins for business blogs as these can help you with improving and tracking the performance of your site significantly:
- Yoast SEO
- Jetpack
- Contact Form by WPForms
- Image optimization & Lazy Load (Optimole)
- MonsterInsights Google Analytics Dashboard for WordPress
- WP Super Cache
Some of these plugins come with premium versions, but you can consider whether you need them later. Log in to your WP dashboard and click on Plugins → Add New to add a plugin. If the plugin is in WordPress, search for it, select it and click Install Now.
For premium plugins, purchase and download the zip file before going to the dashboard. Click on Plugins → Add New → Upload Plugin and choose the zip file from your device. Note that WordPress will review third-party plugins for errors and their compatibility with the WordPress ecosystem and your theme. It may take up to a few days before you can use them.
Make sure you activate your plugins after installation. Note that you don’t need to install plugins to start writing blog posts. However, since most are free, you don’t lose anything and potentially gain a lot by installing the recommended plugins right off the bat.
You can also search the directory for other plugins you might find interesting. Be careful, however, as many site owners make the mistake of installing a bunch of plugins they don’t need. That can lead to security issues on your site, especially if you don’t update them regularly.
As a rule of thumb, limit the number of plugins to around 20. If you’re on a shared or unmanaged hosting platform, keep it to five or six.
Step 7: Start Creating Content

Source: WordPress.org
Posting your first article on WordPress is straightforward. On your dashboard, click on Posts → Add New and start filling out the fields. You can begin composing directly on the editor or copy-paste the content from a word processor. If you have active plugins, you should see them on the right or bottom of the page.
You can organize your blog posts by creating categories and assigning tags. You can add images and other media to your post by clicking on Media, uploading your files, and inserting them wherever you want. WordPress stores all uploaded media in your Media Library, where you can manage and access them at any time.

Source: WordPress.org
When you’re done uploading your content to WordPress, you can choose to Save Draft, Preview, or Publish the post. You can Save and Preview at any time and as many times as you like. You can also choose to publish it immediately or schedule it.
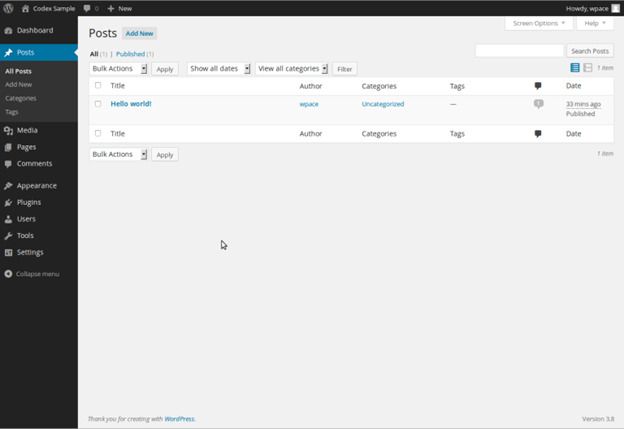
On the Posts page, you can see a list of all your drafts and published posts.
Source: WordPress.org
When you hover over a post, you will see a bunch of options below it, including Edit. If you click Edit, it will bring you to the editor page. If it’s already published, you can update the post to reflect any changes you made.
That’s it! You’ve set up your WordPress blog!
Managing Your WordPress Blog
Starting a WordPress blog could not be simpler than that. However, that’s the easy part. The more challenging part is making sure that your site performs at peak performance, which may take a lot of time.
Sunny HQ can ensure that your WordPress blog is always secure, functional, and up-to-date. We handle the nitty-gritty of website management so you can focus on the core aspects of your business.
Contact us now to find out how we can help you make your blog and business successful! We’ll walk you through whatever you need to know about our managed hosting services.